Table of Contents
Chlamydia is a common sexually transmitted infection (STI) that can have serious health consequences if left untreated. Early detection and treatment are key to preventing these complications. The Chlamydia Field Use Rapid Test Kit, designed for swab samples, offers a convenient and private way to test for Chlamydia infection. This guide provides a step-by-step procedure on how to use the kit effectively.
Precautions
Before starting, it’s crucial to understand and follow these precautions to ensure the safety and reliability of the test:
- The kit is for in vitro diagnostic use only and should not be ingested.
- Treat all specimens as potentially infectious.
- The test is single-use only and should be discarded after use.
- Do not use the kit past its expiration date.
- Ensure the kit’s pouch is intact before use.
- Keep the kit out of children’s reach.
- Properly dispose of the diagnostic device after use to avoid infectious risk.
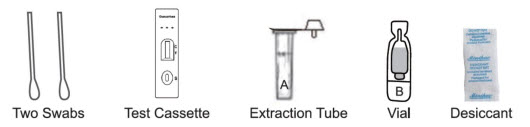
Kit Contents
Each kit contains:
- A test cassette
- An extraction tube pre-filled with Buffer A
- Two swabs (for female testing) or one swab (for male testing)
- A desiccant for storage purposes only, not used in the test
- Buffer B in a pre-filled vial
- Instruction leaflet
Collecting the Specimen
For Male Patients:
- Insert one swab into the urethra of the penis. Rotate gently to dislodge epithelial cells and leave in place for a few seconds before carefully removing, avoiding contact with external surfaces.
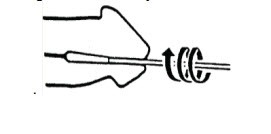
For Female Patients:
- Use the first swab to clear away any discharge at the entrance of the vaginal tract.
- Insert the second swab into the vaginal tract for about 30 seconds, then carefully remove, avoiding contact with external surfaces.

Test Procedure
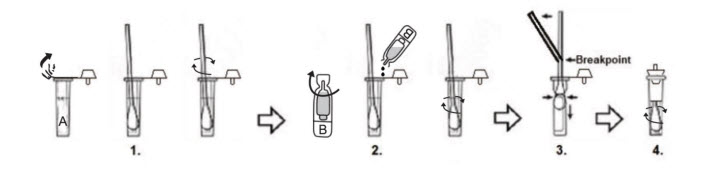
Ensure everything reaches room temperature (15-30°C) before starting.
- Prepare the Sample:
- Tear the film off the extraction tube containing Buffer A.
- Insert the swab into the tube, rotating it against the tube sides about 10 times for no less than 15 seconds.
- Add Buffer B:
- Open the vial containing Buffer B, add all of it into the extraction tube, and rotate the swab again as before.
- Break the swab at its breakpoint, leaving the swab head in the tube.
- Mix the Sample:
- Attach the dripper to the tube and shake vigorously to mix.
- If not testing immediately, store the extracted specimen at 2-8°C and test within 24 hours.
- Conduct the Test:
- Remove the test device from its sealed pouch and place it on a flat surface.
- Hold the extraction tube vertically, adding 2 drops of the specimen into the specimen well (S) without air bubbles.
- Start your timer once the drops are added.
- Read the Results (15-20 minutes):
- Positive results might appear as quickly as 1 minute, but negative results should be confirmed at 20 minutes. Do not interpret results after 20 minutes.
Interpreting the Results
- Positive (+): Rose-pink bands visible in both the control and test regions indicate a Chlamydia infection.
- Negative (-): A rose-pink band in the control region only, with no band in the test region, indicates no detectable Chlamydia infection.
- Invalid: If no bands are visible, or only in the test region but not the control, the test is invalid. Repeat the test with a new kit, and if the problem persists, contact the manufacturer for further instructions.
Conclusion
The Chlamydia Field Use Rapid Test Kit provides a straightforward and private method for detecting Chlamydia infections. By following these detailed steps, individuals can confidently conduct the test and interpret the results. Remember, a positive test result requires follow-up with a healthcare provider for confirmation and treatment.